WorkLedger guide
Sites
Use sites to separate attendance, labour cost, receipts, and expenses by project. Keep site names distinct and close completed sites only after reviewing reports.
Category Sites & finance
Organize work by site
Open Sites
Open Sites and review the current active and inactive project records before adding a new site.
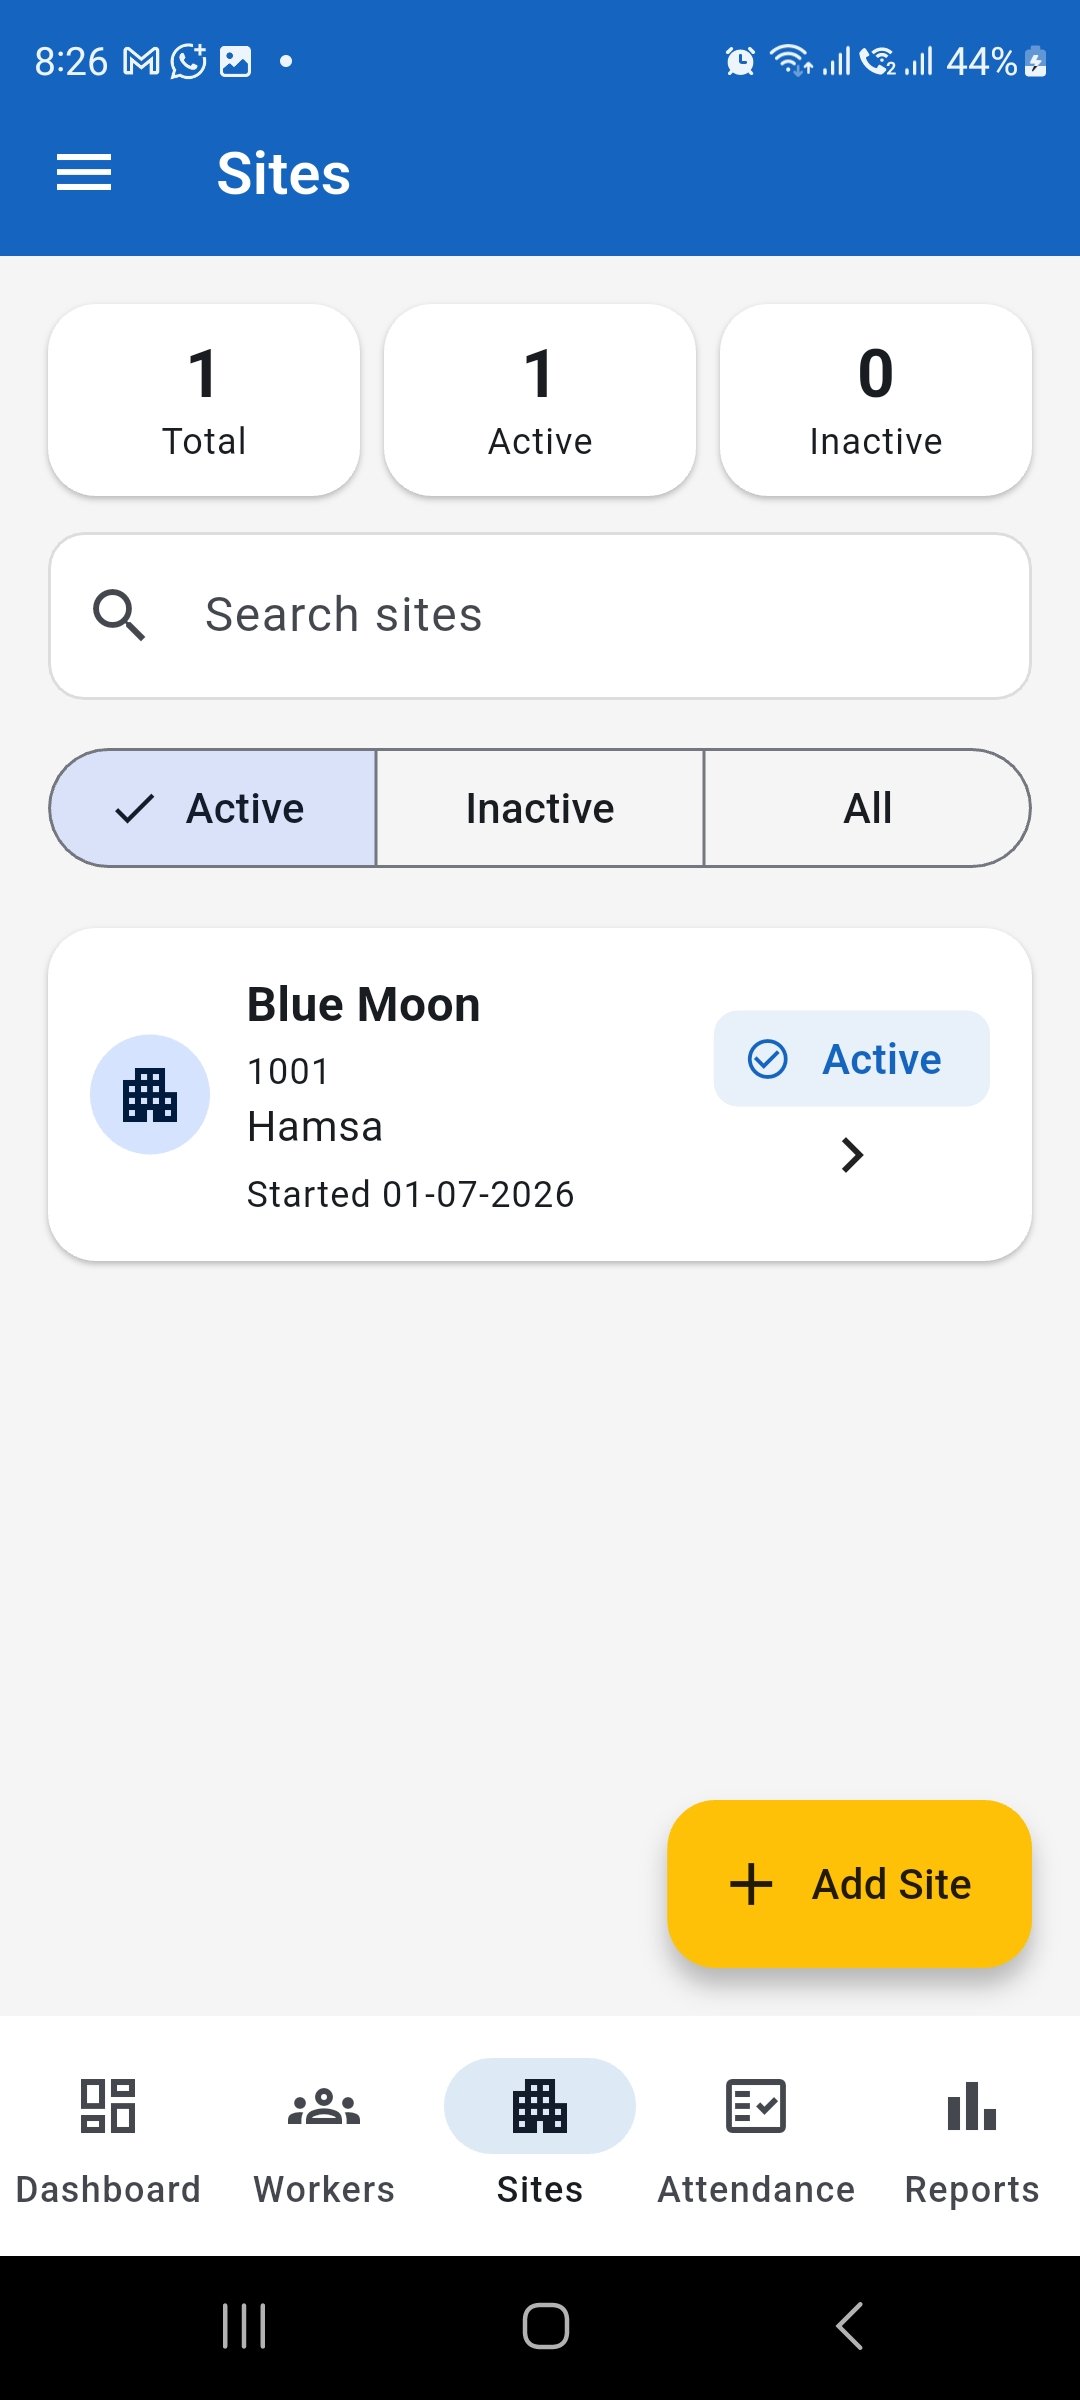
Review existing sites before adding a new project. Add a new site
Tap Add Site and enter the basic site information, including the site code, site name, client name, and mobile number.
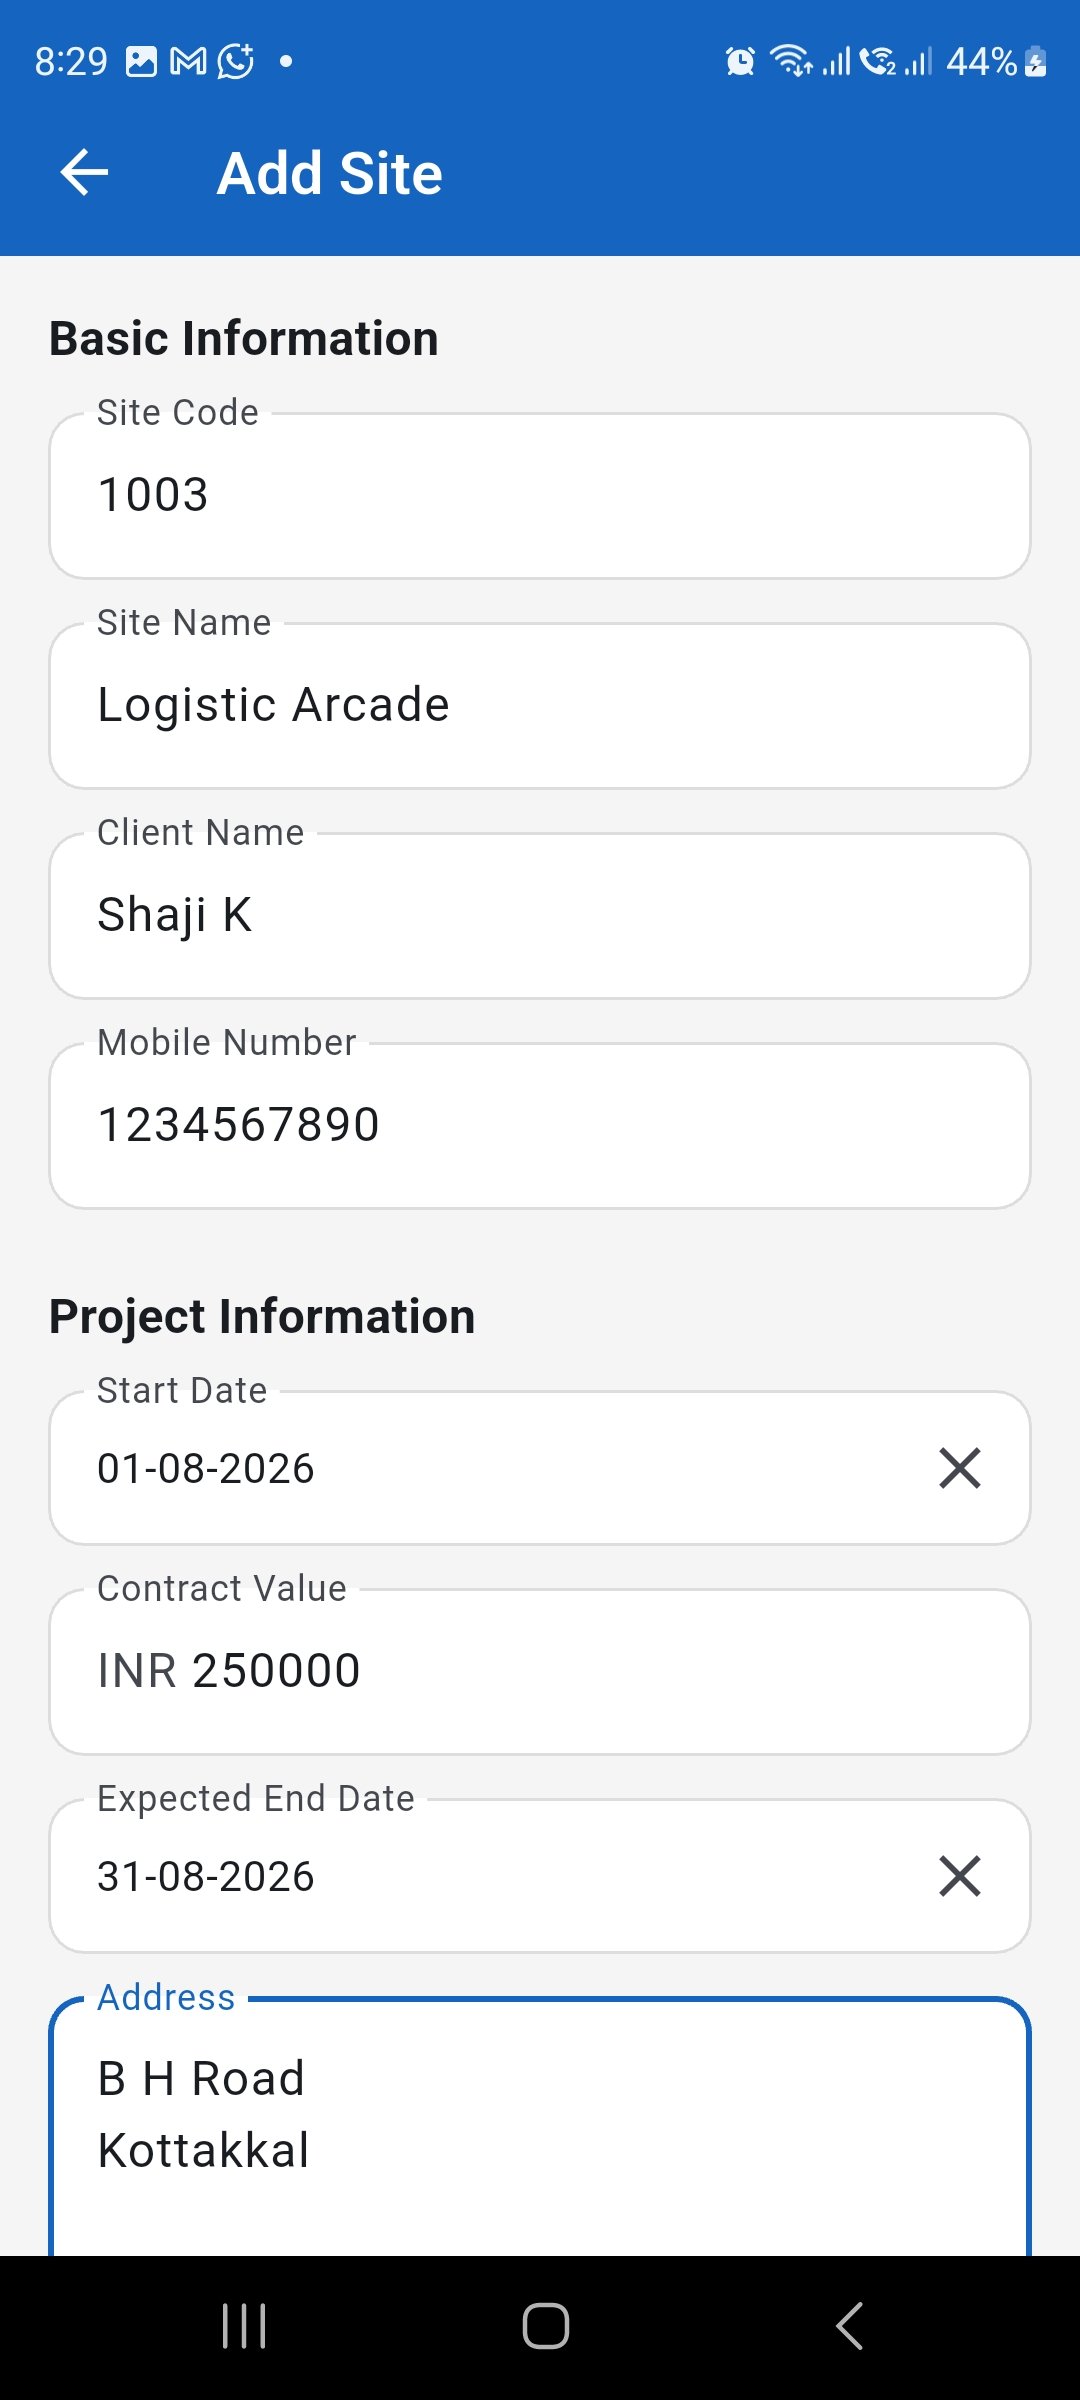
Enter the site code, site name, client details, and contact number. Enter project information
Enter the project start date, contract value, expected end date, address, and any additional notes. Keep the site Active while it is available for attendance and labour entries.
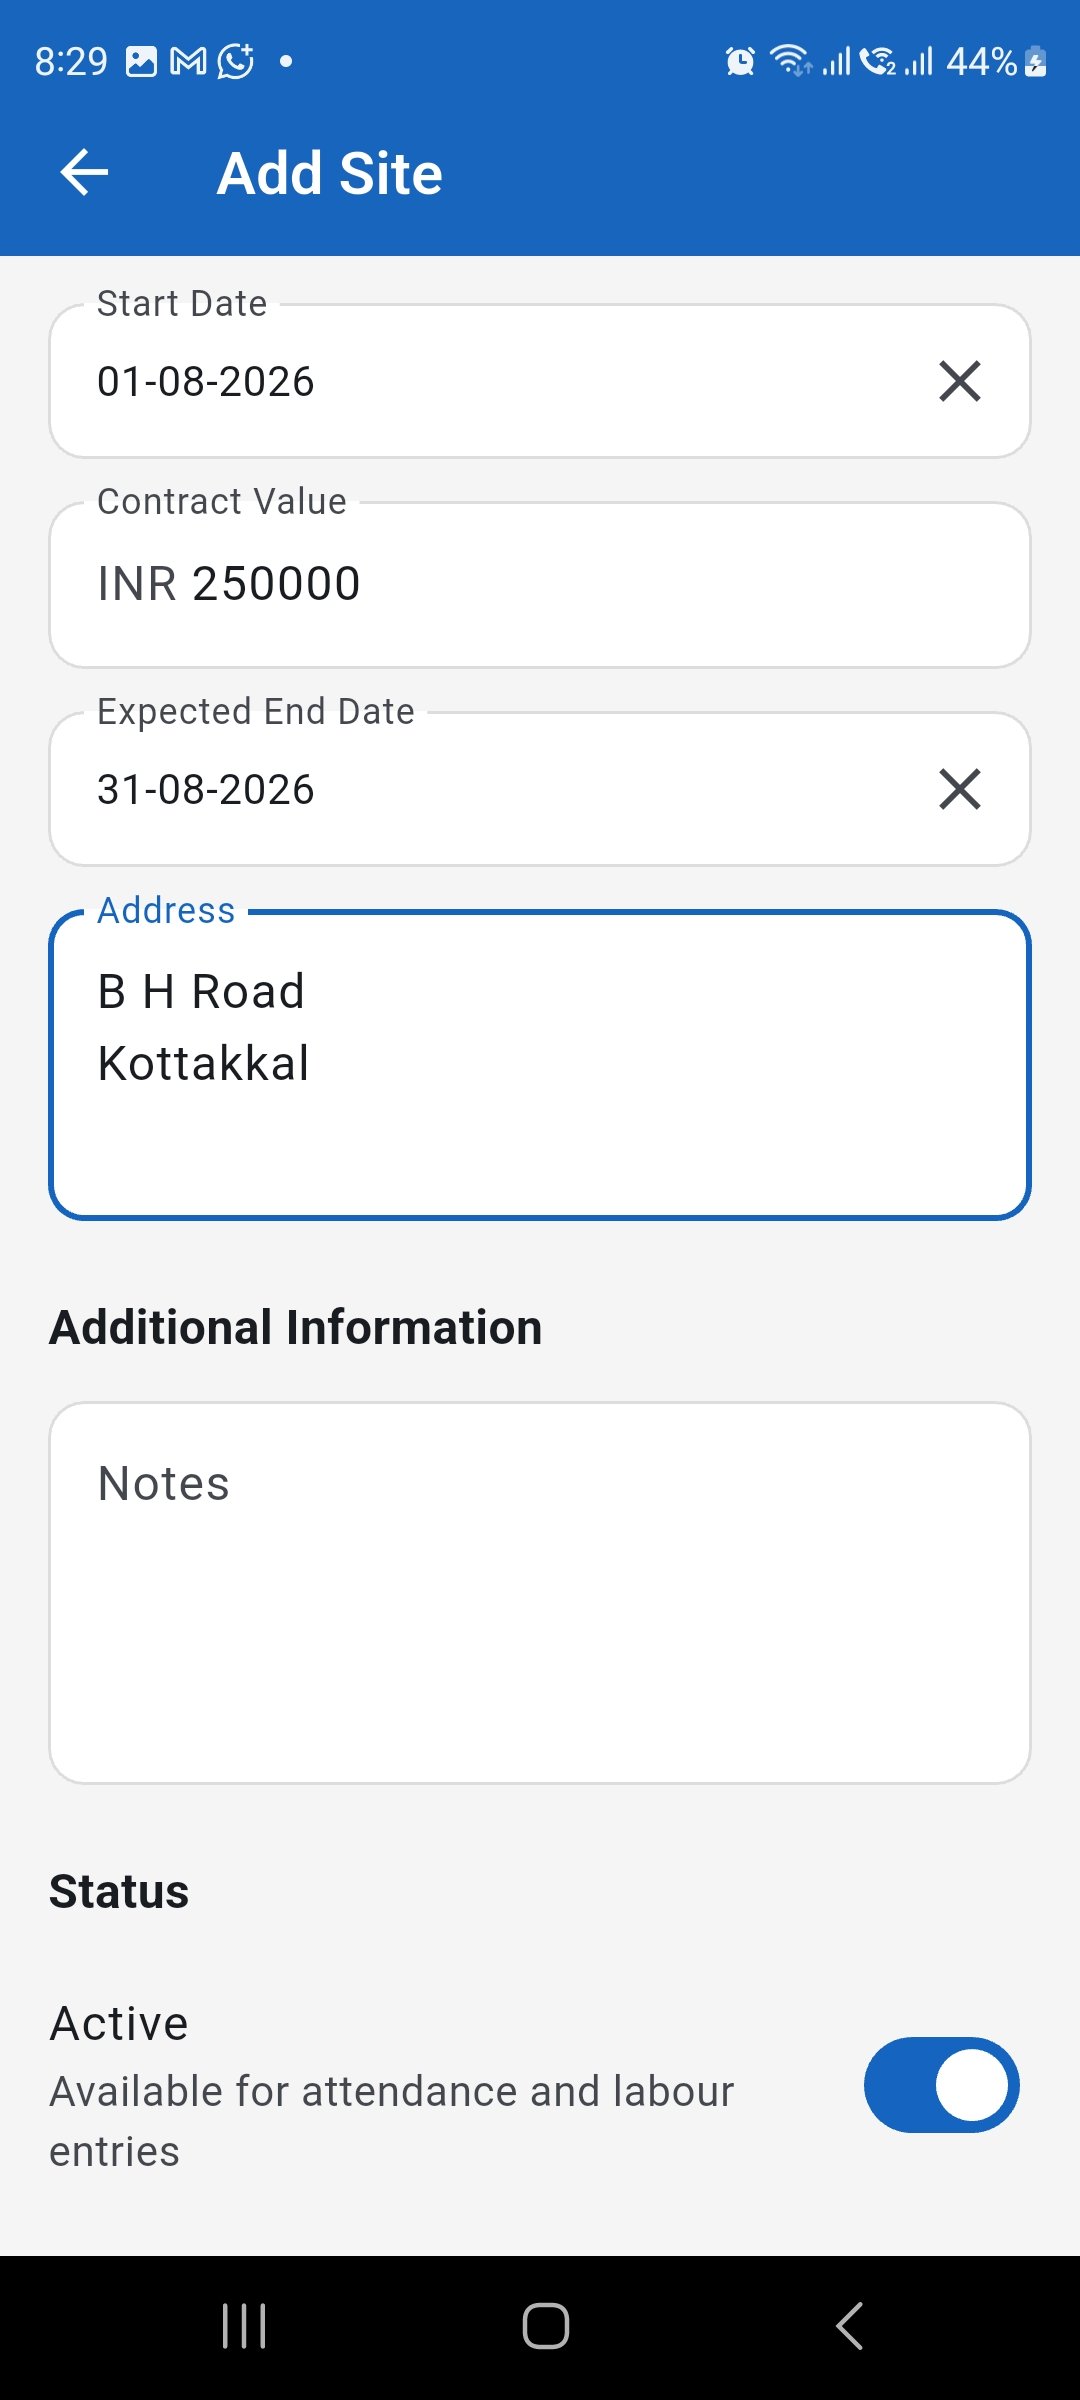
Complete the project information and confirm the site status. Confirm the site was created
Return to the Sites list and verify that the new site appears with the correct name, code, client, start date, and Active status.
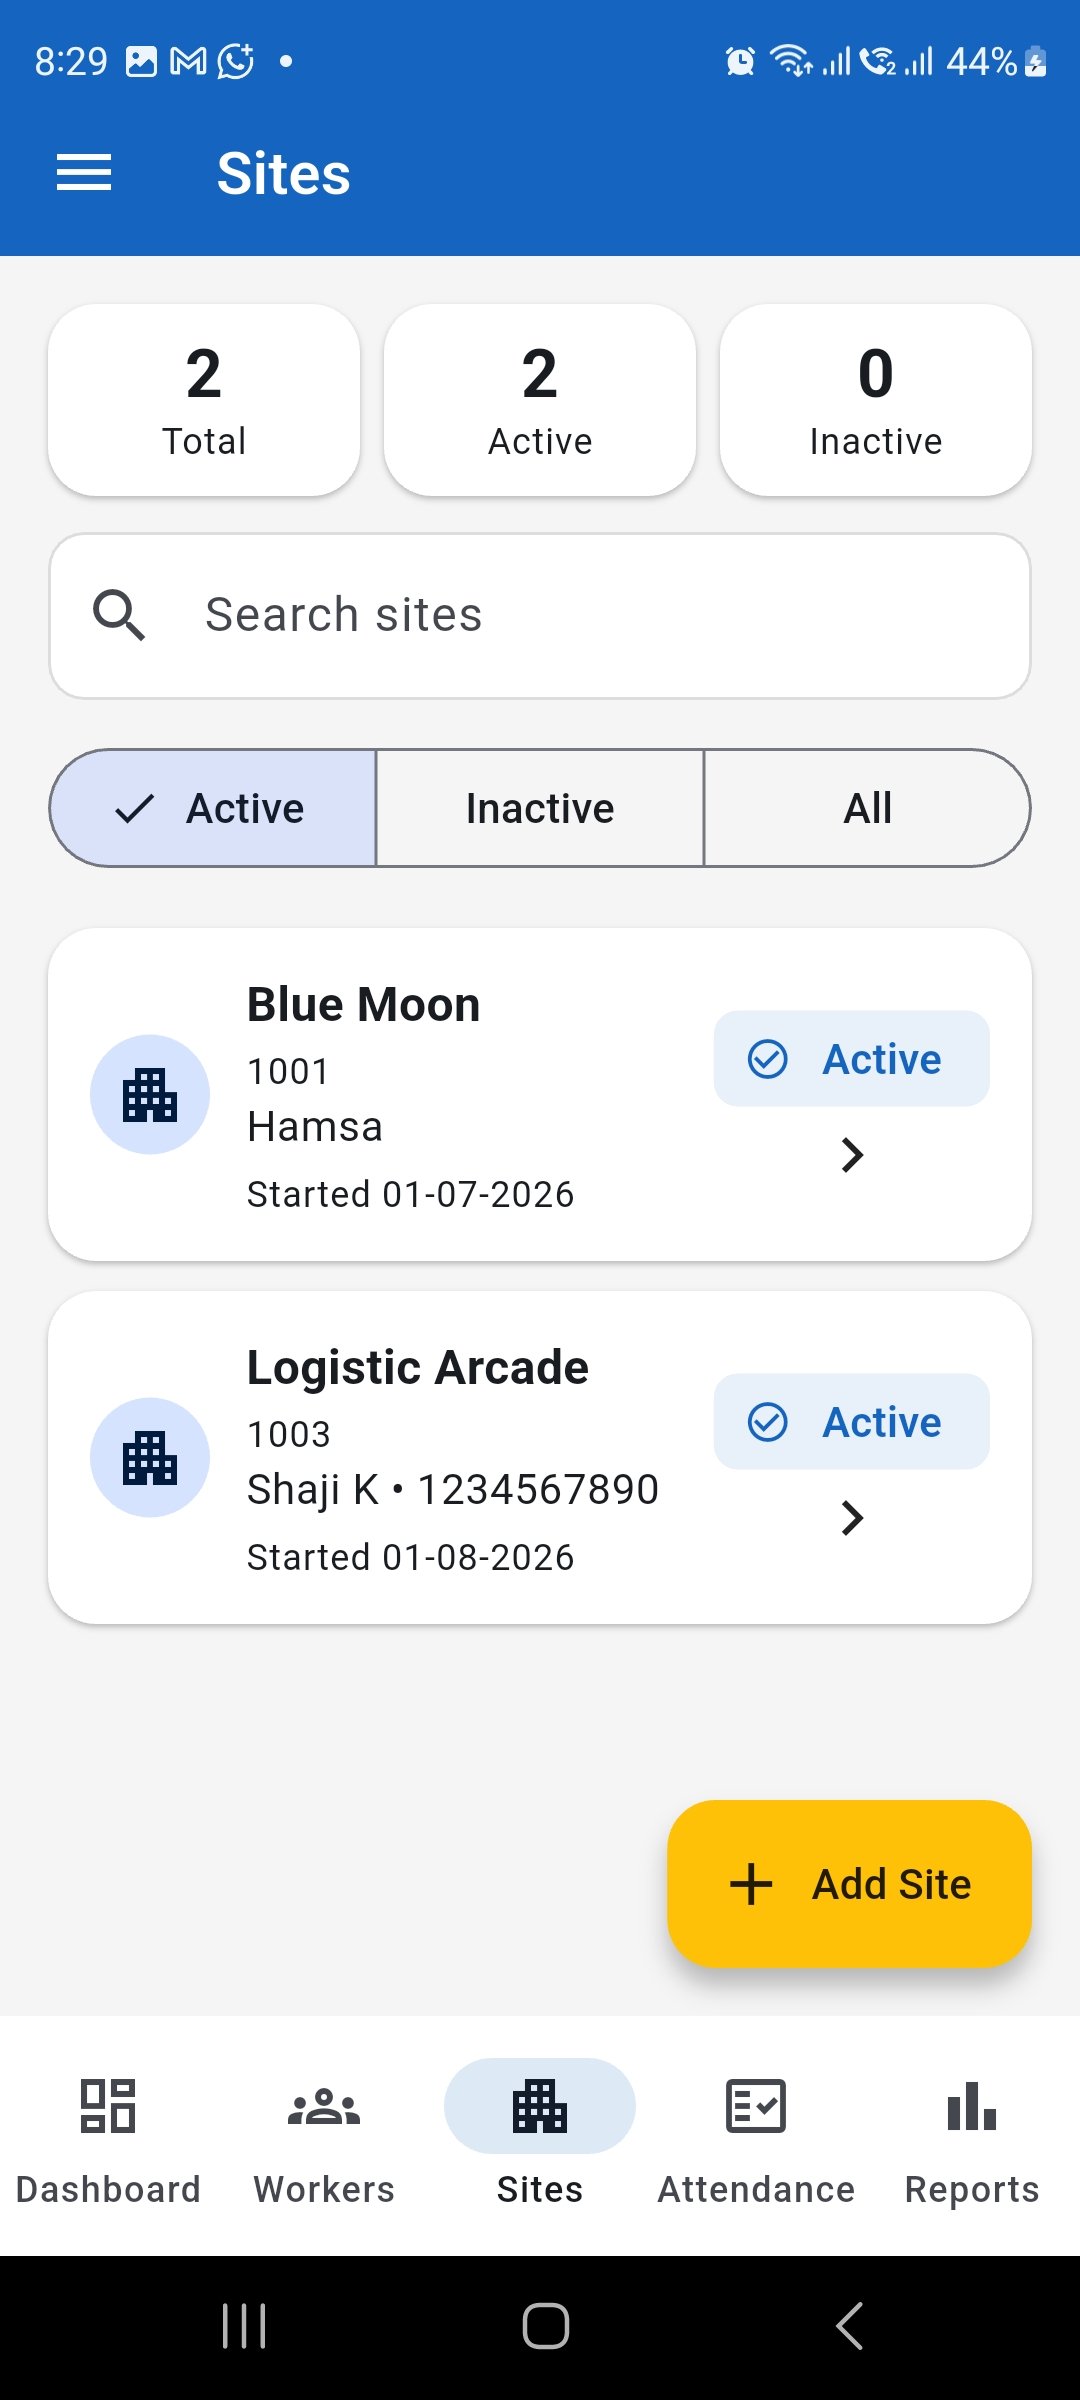
Confirm that the new site appears correctly in the Sites list. Review site details
Open the site and review the saved basic information and project information before making further changes.
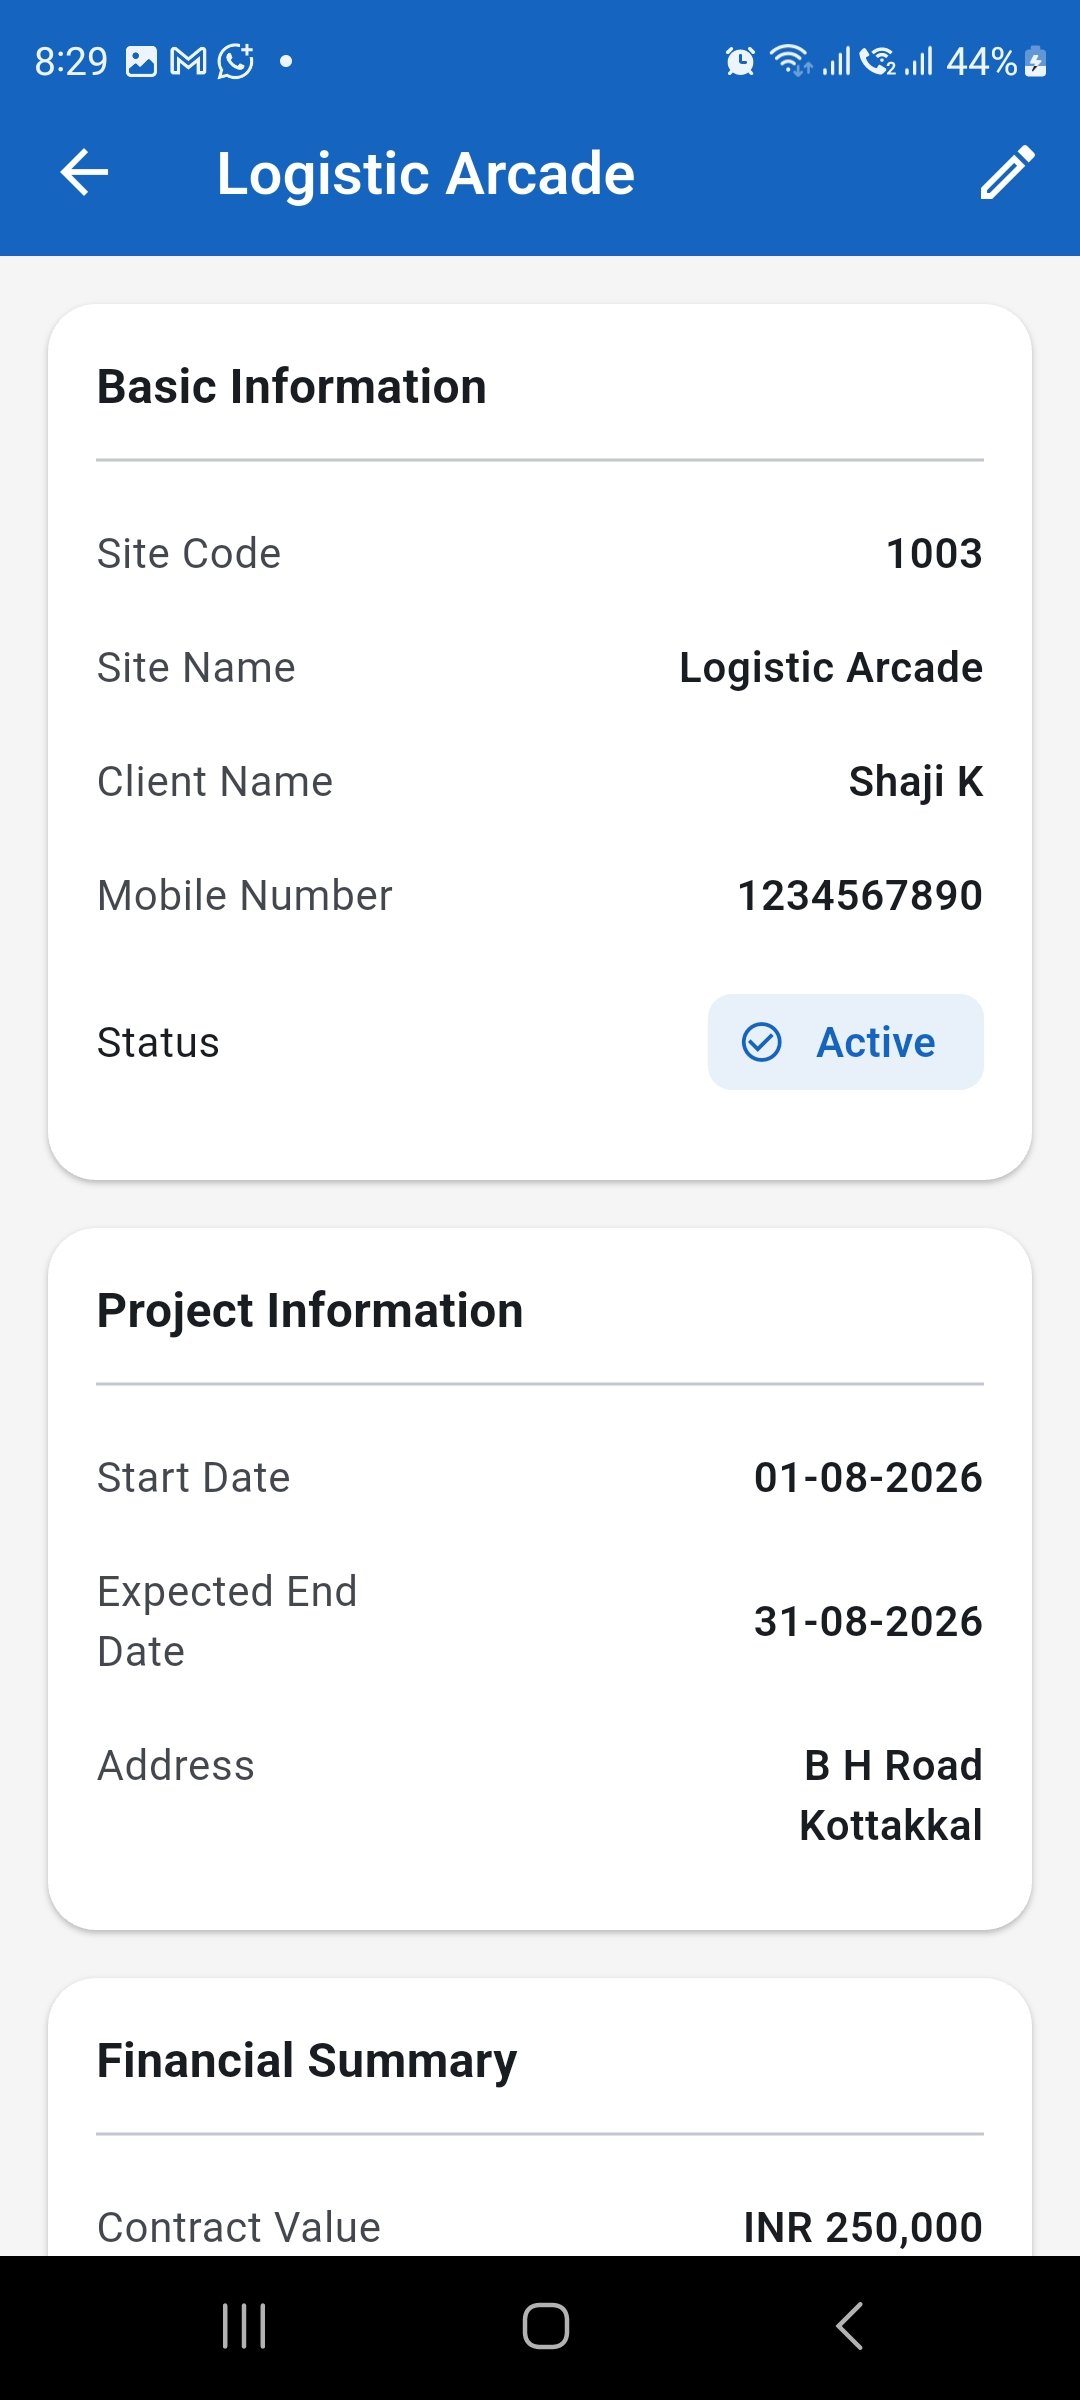
Review the site information and project dates before editing or closing the site. Review the financial summary before closing
Review the contract value, receipts received, client outstanding amount, labour cost, other expenses, project cost, cash position, and profit or loss before deactivating a completed site.
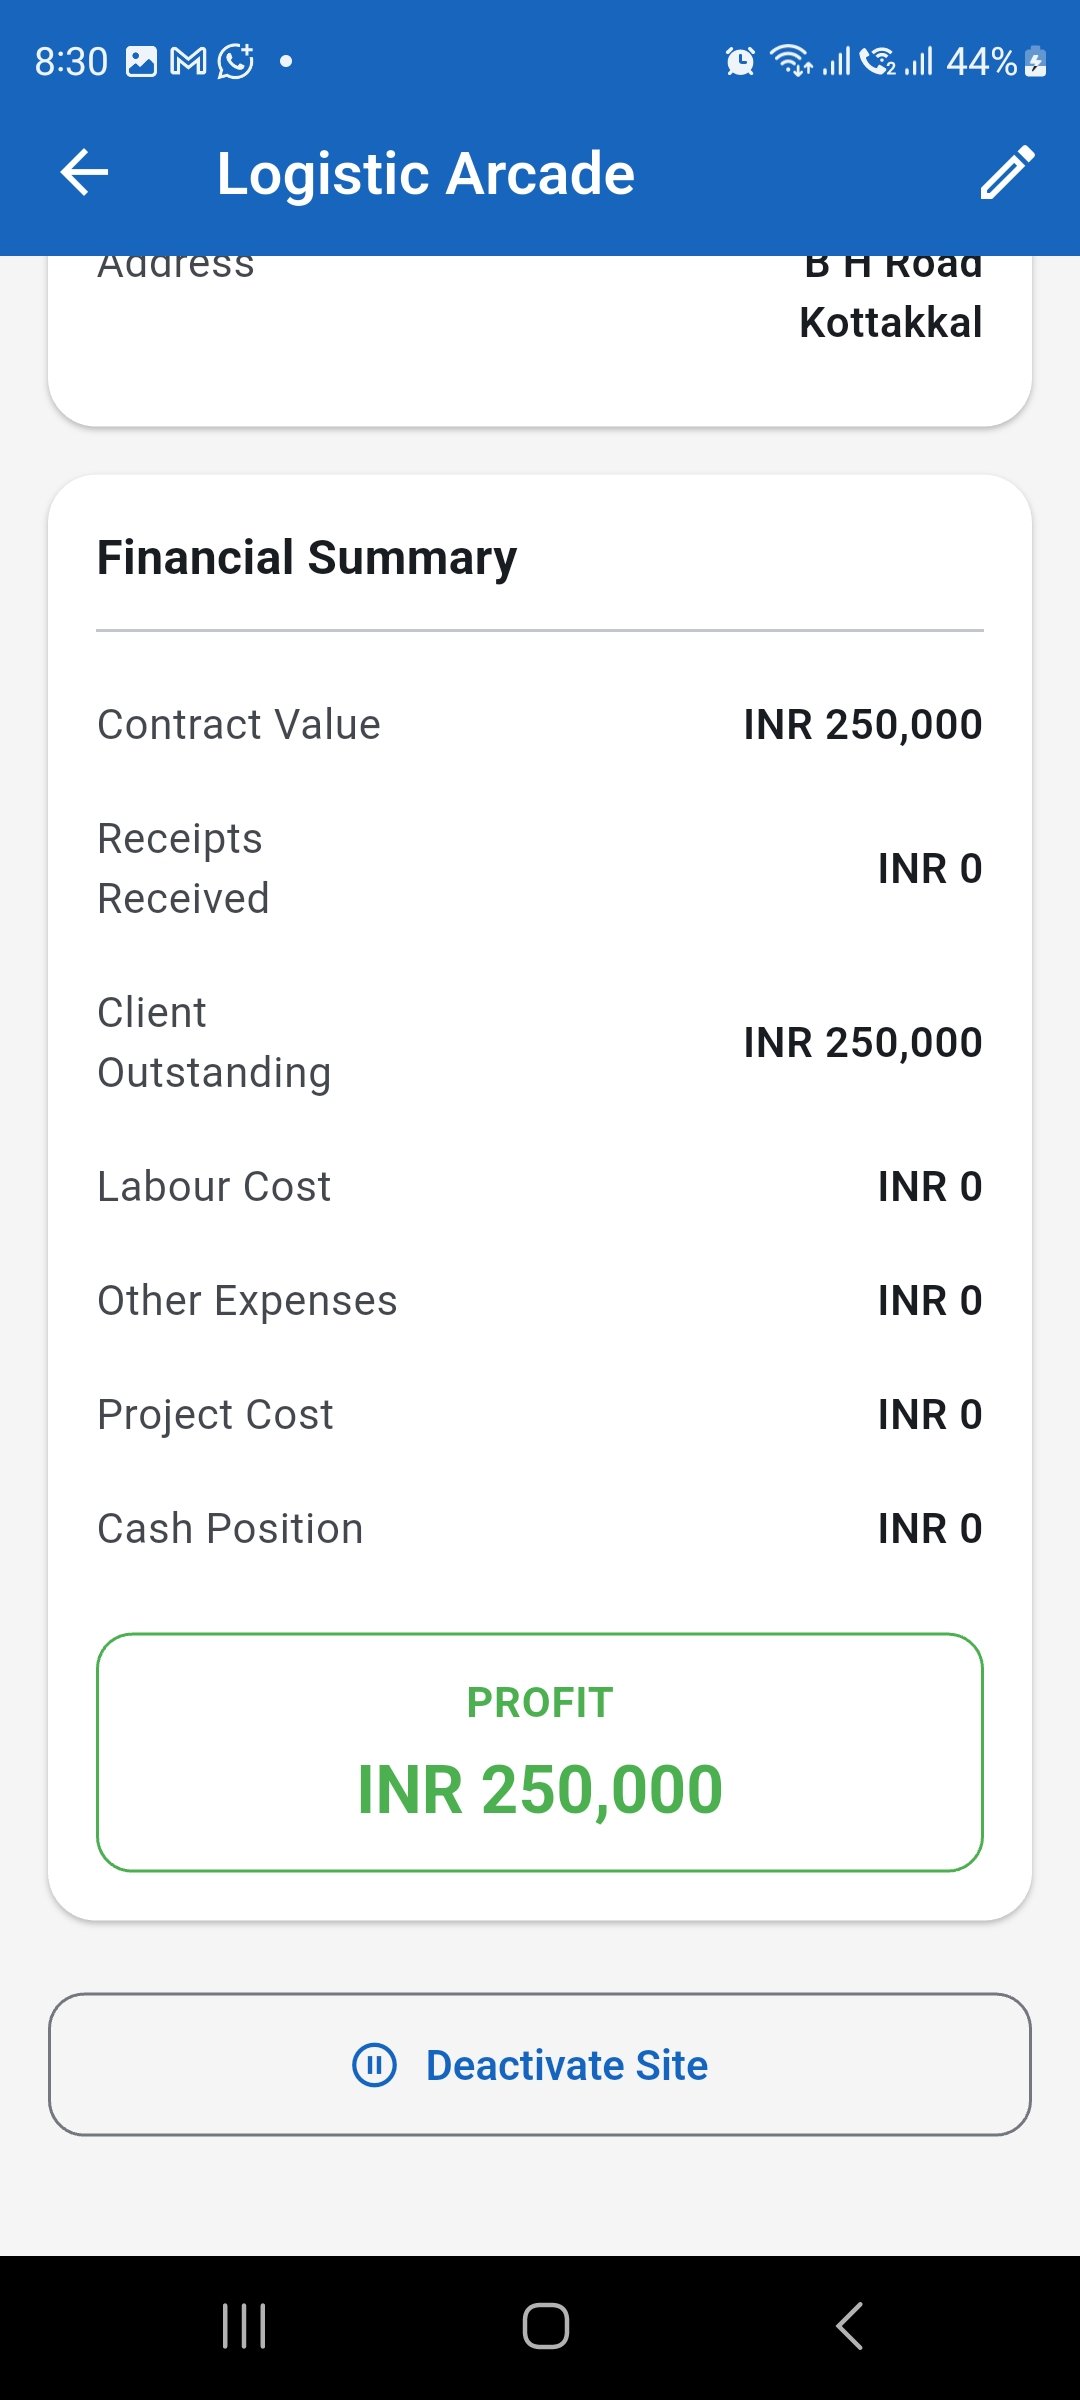
Review the site financial summary before deactivating a completed project.